


Water Drop Photography | Tom Greetham
Like so many of us I was faced with the challenge of having to generate all of my photography from the comfort of my home and garden, at least for the foreseeable future. I wrote down a ‘bucket list’ of subjects that could be achieved without going outside of the home and water drop photography was the first to go down. It is a subject that has a lot of variations to try and a huge amount of room for experimenting. The following guide is not the only way to do this type of photography, but if you are trying it for the first time then hopefully it gives you a few helpful pointers. If you have other people in the house with you then this is also a great subject to get them involved with. Enjoy!
The Equipment
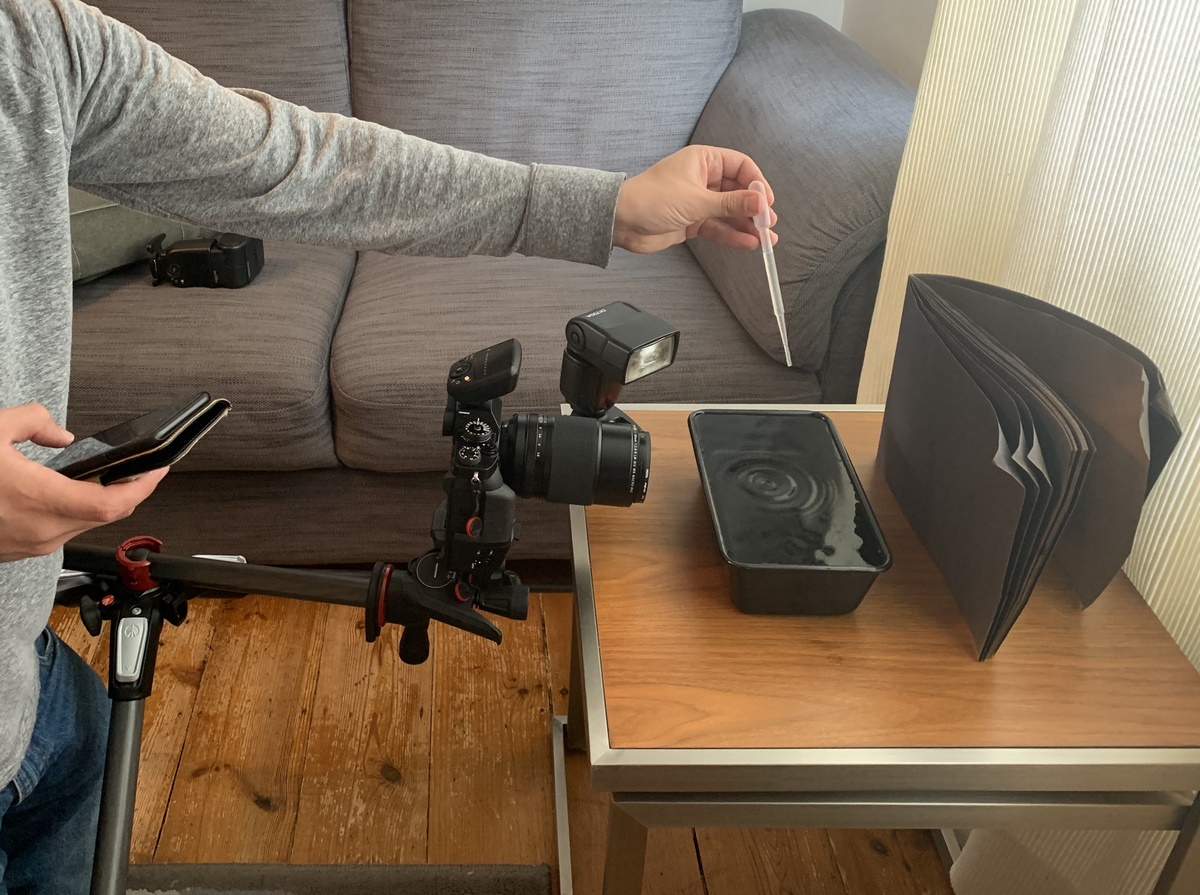
First of all, you will need a tray to hold the liquid in. I experimented with a black baking tray and a black sandwich loaf tin, but you can use wine glasses, measuring jugs, vases etc. You will also need something to drop the water with, a sponge filled with water is one solution, but the drips can be erratic. In this instance, I used pipettes filled with water, but anything that can drip in any controlled fashion will work well. I also used a black piece of card to provide a background, but again, different coloured pieces of card will give different effects. In terms of camera equipment, my setup consisted of camera, macro lens, tripod, 2x flashguns triggered wirelessly and a wireless remote. Don’t worry if you don’t have all of these things, but I certainly recommend using a macro lens (or a lens with a good close focus) and at least one flashgun to get the best results.
When it comes to lighting you could also use a constant light source. High powered torches or LED panels can work well. Lighting from the side gave me the best results, but I recommend playing about with the lighting as you progress through the session. Please be wary of getting any camera equipment wet. A dry flannel or small towel draped over the top of the camera and lens so that only the front of the lens and rear of the camera is exposed is one method of protecting your kit. Some camera equipment comes with a degree of weather resistance, but if you are concerned then I recommend protecting your camera equipment.
The Setup
Place your tray (I filled mine as close to the top as I could) of liquid on a table and stand your background behind it (if using one). If you are not using an additional flashgun then I recommend using somewhere with a strong light source, outdoors or near a window with plenty of daylight. Place your tripod on the side of the tray of water. My tripod was positioned on the floor and adjusted to the right height, but tabletop tripods also work with this setup, just make sure it is sturdy enough for your camera and lens combination. I positioned my camera and lens so that it was just above the water and as close to horizontal as possible. Small tip, I recommend shooting these images in RAW rather than JPEG. Due to the abstract nature of this subject RAW files will give you even more creative control once you have captured your images.
My advice is to set your lens to manual focus and set the focus to where you are going to drop the water. I used a 30cm focusing distance with my macro lens and then marked that distance on the side of the tray so that I had a reference when I started dropping the water. This will depend on your own setup, if you are not using a macro lens then I would advise setting the zoom to the furthest distance and the closest focusing distance. For example, if you are using an 18-55mm lens then I would recommend setting your lens to 55mm and set your focus distance to around 25cm or 30cm. To make sure my focus was set correctly I put my finger in the water at the distance required and focused the lens accordingly. Once your manual focus is set then you shouldn’t need to adjust it again.
I used two different setups. In my first setup, I used two flashguns, positioned to each side of the camera pointing directly towards the area where the drops were targeted. If you have a way to trigger these flashguns wirelessly then this is a bonus (I used 2x Nissin Di700 flashguns triggered by an air remote), but there are ways to trigger flashguns off-camera using cables etc. If you have a cabled or wireless remote (to trigger the camera) then I recommend using that. I used the FujiFilm Cam Remote app for my FujiFilm camera. If your camera has a WiFi or BlueTooth connection then it is likely that you have a way of triggering the camera wirelessly, it is worth setting up if so.
In the second setup, I set my tray of water in front of a window with the curtain diffusing the light and then fired one flashgun from the left-hand side of the camera targeting the flash-gun to the target of the water drops.
The Method
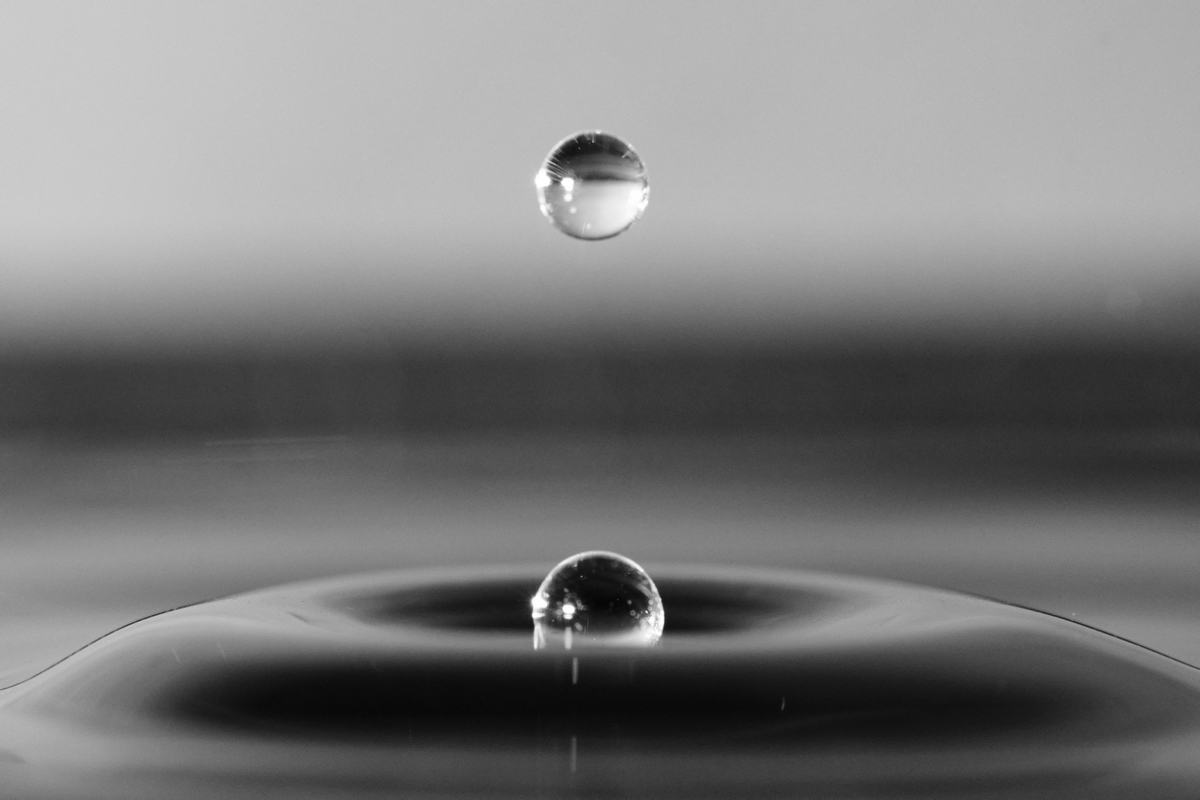
Now you are all set up and ready it is a case of timing and accuracy. There is no rule per se on the distance to drop the water from. I found between 30cm and 60cm gave me the best results, try having fun with it. I varied my shutter speeds occasionally to see what gave me the best results. My recommendation is to use a shutter speed of 1/250th or faster in order to freeze the action as much as possible. If your flashguns are capable of syncing at high speeds then it is certainly worth playing about with this. In the first setup, my best results came from 1/1000th of a second and using an aperture of F11, but I would vary your aperture, shutter speeds and ISO until you get the exposure you like. In this setup I used single-shot mode, the second setup below used continuous shot.
In my second setup, I used a flashgun power of between 1/64 and 1/32. I then set the camera settings to ISO 640, shutter speed 1/250s and aperture of F11. I set the camera to continuous low and used the remote to continuously fire the shutter. This helped me concentrate the drops in the right place and seemed to yield more consistent results.
Once you have an exposure set up I would shoot a series of shots at those parameters and see how it goes. The tricky bit is getting the water to drop in the right place and timing. If my experience is anything to go by then you will get more misses than hits. Don’t be discouraged, play around with the exposures, lighting, shutter speeds and backgrounds and see what effects you get. If you are using additional lights then I can recommend using different coloured gels to give you different colour effects.
I have had it recommended to me to try using glycerine, dissolved sugar, guar gum or even milk in place of water to give different effects. There are ways of setting up water drops so that they drop consistently from a bag or bottle suspended above the tray, check out the David Newton live stream video (link below) for some more great tips and set up ideas.
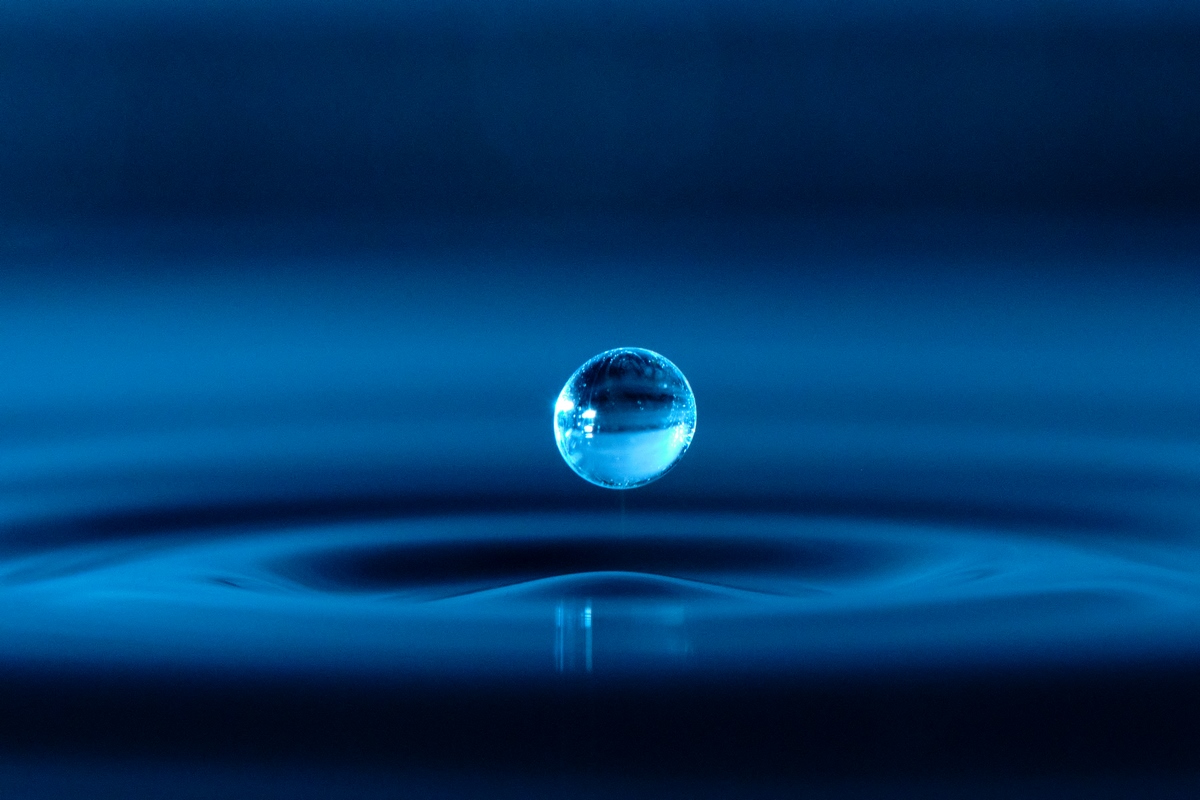
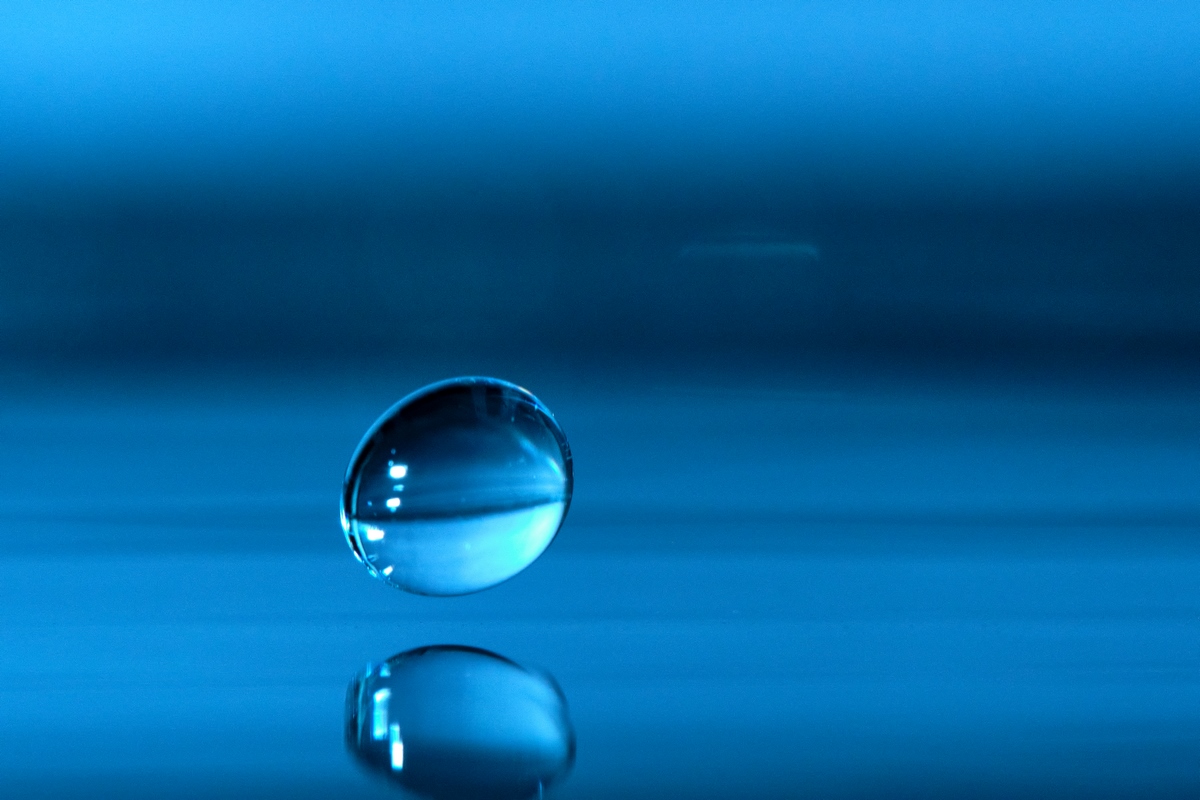
Once you have your bank of images it is time to get creative with your editing software. Playing with white balance, contrast, exposure, levels etc. can give you a variety of different effects. My favourite effect came from pulling the white balance back to 3000k and reducing the tint to -15, this gave a pleasing blue tone to the image. It is purely subjective though.


Tom’s equipment used: Fujifilm X-T3, Fujifilm 80mm F2.8 macro lens, Manfrotto 055CXPro3 tripod, Manfrotto XPRO 3 way geared head, 2x Nissin Di700 flashguns, Nissin Air remote.
Facebook Live - Water Drop Photography at Home with David Newton
Alternatively feel free to watch our Facebook Live Stream, recorded 21st April, with Canon & Dave Newton on how to shoot low budget Water Drop Photography.

Hahnel Captur Module Pro
- Captures Time Lapse Photography, High Speed Photography, Motion & Wildlife Photography
- Four built-in sensors (light, sound, Laser*& IR)
- Auxiliary port allows to connect 3rd party sensors such as pressure plates, humidity & temperature sensors
- Fully programmable timed sequences including delay, interval timer, exposure count & exposure length setting
- Shutter release button with autofocus, single & continuous shooting & bulb mode
- Connect wirelessly to camera using the 'Captur' (sold separately)
- Powered by AA batteries

Fujifilm XF 80mm F2.8 R LM OIS WR Macro
Save £150 - was £1149.00- 2 Year Fujifilm Warranty
- X-Mount Lens/APS-C Format
- 122mm (35mm Equivalent)
- Aperture Range: f/2.8 to f/22
- One Aspherical Element, Four ED Elements
- Super EBC Coating
- Linear AF Motor, Floating Focus System
- 1:1 Magnification, 9.8" Minimum Focus
- Optical Image Stabilisation
- 62mm Filter Size


About Us
Complaints Procedure
Delivery Info
Employee-owned company
Modern Slavery Statement
Official Orders
Privacy Statement
Security
Support and Returns
Terms and conditions
Vulnerable Consumer Policy
WEEE Policy
Finance
Landing Pages
Banner Promotions
Interest Free Promotions
Cash Back Promotions
Black Friday Deals
LCE Newsletter
We Buy Cameras
New Equipment
Secondhand
All New Equipment
All Secondhand
All New Trade In
All New Categories
